Not content with just riding bikes, I’ve always been keen to learn more about how they work, how to fix those annoying rattles and creaks, or how to upgrade and change them to suit me. If I buy an ‘off the peg’ bike, it is rare that I don’t want to change something that makes riding it a more comfortable experience, perhaps a handlebar stem or the saddle, or fitting lower gearing for climbing the Peak District hills.
When a last minute cancellation led to the opportunity to attend a one day advanced cycle maintenance course with Bike Right – www.bikeright.co.uk I jumped at the chance to have a bit of guided help with those parts of the bike that had always mystified me, such as headsets and bottom brackets. I spent the day learning more about how things work, and took my own bike to work on and service. I came away from it not knowing the intricate details of every different type of bottom bracket, but more importantly with the confidence to have a go myself, and learn more.
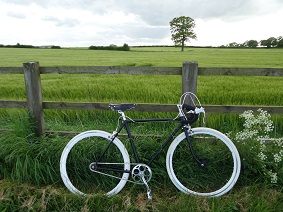
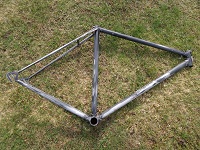
The following week, I acquired a old Dawes frame. I still haven’t identified the model but the head badge design pointed to it being from the 70’s. Buying a ‘bare’ frame, with no bottom bracket, headset or seatpost attached means that a lot of accurate measuring is required to ensure you buy the correct parts that fit. I have always wanted to try cycling a single speed and fixed wheel bike so I decided to use a flip flop hub to build up the bike to give me options for both. Read more about my fixed gear adventures here.
The paintwork on the frame was average, with a small amount of surface rust, and a couple of very small dents so I decided to have a go at prepping the surface and spray painting it myself. I had read that it is difficult to get a durable, professional finish with home spray painting and this is true to an extent. The key to getting a decent finish is patience; patience to leave it to dry, and patience to use light thin coats and build up the finish. If I had to do it again it would probably be cheaper, (the paint is very expensive) and certainly less time consuming to simply get it sandblasted and powder coated, but I don’t regret having a go myself.
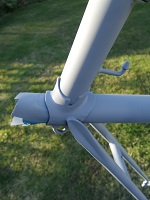
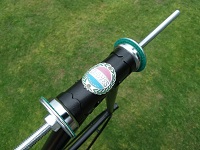 Once the frame was sanded down, dents filled, primed, painted and lacquered, it was time to start building the bike up. You can spend a fortune on tools to assist with putting together a bike, but costs can be cut if you do want to try the DIY option. The crown race was fitted on to the fork, courtesy of a vacuum cleaner pipe that was the perfect diameter to be bashed, (technical term) with a hammer to attach it to the fork. The headset race was attached with a threaded rod, nuts and washers to apply enough force to fit them to the frame. The rest of the assembly was achieved with the use of a cheap cycle tool kit, most of these include bottom bracket tools to allow you to fit and remove standard bottom brackets, and an assortment of spanners to setup the headset, or tighten wheel nuts.
I really enjoyed the process of starting from scratch, and learnt a lot, building a bike is something I recommend to any bike obsessive. The first ride on a bike that you have put together yourself is very special, and has given me a lot of confidence in understanding how a bike works. It has to be said though, that although you can build to your own specification, it certainly costs more to build up a bike up from bits, than refurbish a complete bike, so bear this in mind. Although I found part of the fun is the shopping for parts to build it up.